

Python has a great set of tools called Django for building web applications. Django is a web framework—a set of tools designed to help you build interactive websites.
Setting Up a Project
Creating a Virtual Environment
We’ll first set up a virtual environment. A virtual environment is a place on your system where you can install packages and isolate them from all other Python packages.
Create a new directory for your project called my_project, switch to that directory in a terminal, and enter the following code to create a virtual environment.
my_project$ python -m venv ll_env
my_project$
Now we need to activate the virtual environment using the following command.
my_project$ source ll_env/Scripts/activate
(ll_env)my_project$
When the environment is active, you’ll see the name of the environment in parentheses. To stop using a virtual environment enter deactivate.
Installing Django
Enter the following command to install Django
(ll_env) my_project> pip install djangoCreating a Project
Enter the following commands to create a new project
(ll_env) my_project> django-admin startproject new_project .Don’t forget this dot, or you might run into some configuration issues when you deploy the app.
Creating the Database
We need to create a database that Django can work with. Enter the following command
python manage.py migrateEnter the runserver command as follows to view the project in its current state
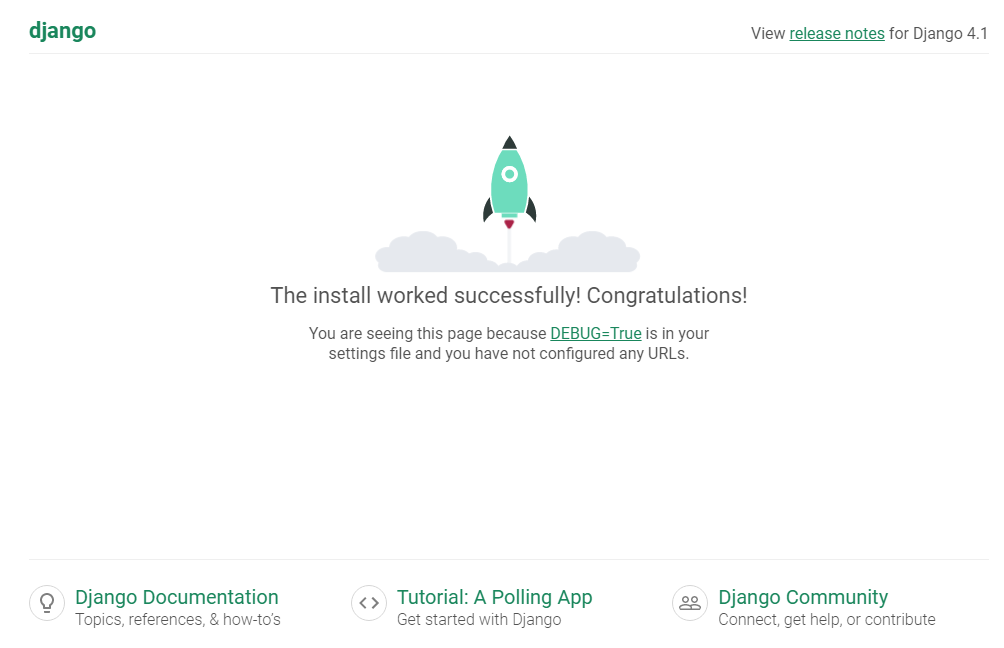
python manage.py runserverOpen a web browser and enter the URL http://localhost:8000/, or http://127.0.0.1:8000/ .You should see something like Figure 1
When you want to stop the server, press ctrl-C in the terminal.
Building a Blog Application
You will learn how to create a simple blog application using Django and help you to get a general idea of how the framework works, an understanding of how the different components interact with each other, and the skills to easily create Django projects with basic functionality.
From the project’s root directory, run the following command:
python manage.py startapp blogDefining Models
Creat POST model
First, you need to define a Post model. Add the following lines to the models.py file of the blog application.
class Post(models.Model):

	STATUS_CHOICES = (('draft','Draft'),('published','Published'),)
	title = models.CharField(max_length=250,unique_for_date='publish')
	slug = models.SlugField(max_length=250)
	author models.ForeignKey(User,on_delete=models.CASCADE,related_name='blog_posts')
	body = models.TextField()
	created = models.DateTimeField(auto_now_add=True)
	updated = models.DateTimeField(auto_now=True)
	status = models.CharField(max_length=10,choices=STATUS_CHOICES,default='draft')
	publish = models.DateTimeField(default = timezone.now)

	class Meta:
		ordering = ('-publish',)

	def __str__(self):
		return self.title
This is your data model for blog posts. Let’s take a look at the fields you just defined for this model:
- Title: This is the field for the post title. This field is CharField, which translates into a VARCHAR column in the SQL database.
- Slug is a short label that contains only letters, numbers, underscores, or hyphens. You will use the slug field to build beautiful, SEO-friendly URLs for your blog posts.
- Author: This field defines a many-to-one relationship, meaning that each post is written by a user, and a user can write any number of posts.
- Body: This is the body of the post. This field is a text field that translates into a TEXT column in the SQL database.
- Publish: This DateTime indicates when the post was published.
- Created: This DateTime indicates when the post was created
- Updated: This DateTime indicates the last time the post was updated
- Status: This field shows the status of a post
The Meta class inside the model contains metadata. You tell Django to sort results by the publishing field in descending order by default when you query the database. You specify the descending order using the negative prefix. By doing this, posts published recently will appear first.
Activating Models
add blog to the INSTALLED_APPS setting. It should look like this:
INSTALLED_APPS = [
 'django.contrib.admin',
 'django.contrib.auth',
 'django.contrib.contenttypes',
 'django.contrib.sessions',
 'django.contrib.messages',
 'django.contrib.staticfiles',
 'blog',
]
Creating the Database
Now that you have a data model for your blog posts, you will need a database table for it. First, you will need to create an initial migration for your Post model. Enter the following command.
python manage.py makemigrations blog
So next we need to create a database that Django can work with. Enter the following command
python manage.py migrateThe Django Admin Site
Now we will create a simple administration site to manage your blog posts. First, you will need to create a user to manage the administration site. Run the following command:
python manage.py createsuperuser
Open http://127.0.0.1:8000/admin/ in your browser. You should see the administration login page, as shown in the following screenshot:


Let’s add your blog models to the administration site. Django created an admin.py file in the same directory as models.py. Open the admin.py file. Edit the admin.py file of the blog application and make it look like this:
from django.contrib import admin
from .models import Post
admin.site.register(Post)
This code first imports the model we want to register, Post. The dot in front of models tells Django to look for models.py in the same directory as admin.py. The code admin. site.register() tells Django to manage our model through the admin site.

Now reload the administration site in your browser. You should see your Post model on the site.
Click on the Add link beside Posts to add a new post. You will note the form that Django has generated dynamically for your model, as shown in the following screenshot:

Customize the administration site
Edit the admin.py file of your blog application and change it, as follows:
from django.contrib import admin
from .models import Post

@admin.register(Post)
class PostAdmin(admin.ModelAdmin):
 list_display = ('title', 'slug', 'author', 'publish', 'status')
 list_filter = ('status', 'created', 'publish', 'author')
 search_fields = ('title', 'body')
 prepopulated_fields = {'slug': ('title',)}
 raw_id_fields = ('author',)
 date_hierarchy = 'publish'
 ordering = ('status', 'publish')
Return to your browser and reload the post list page. Now, it will look like this:
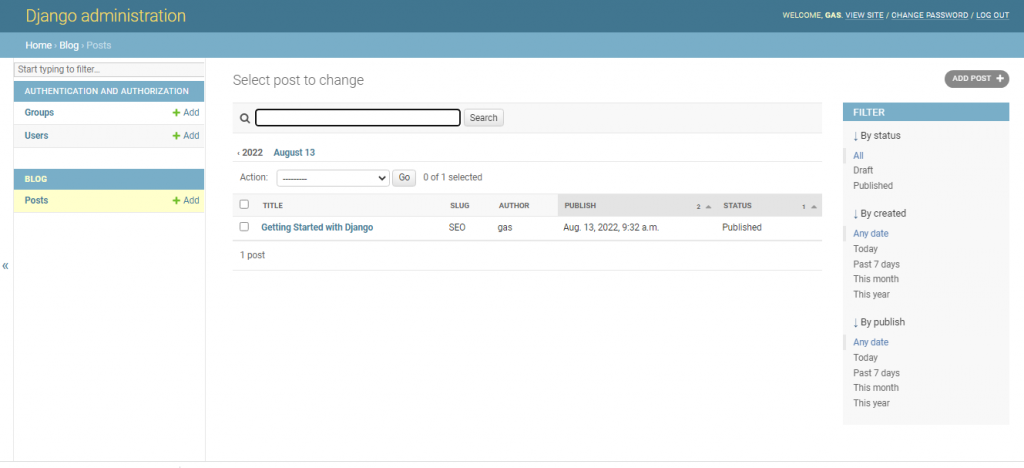
The list page now includes a right sidebar that allows you to filter the results by the fields included in the list_filter attribute.
A search bar has appeared on the page. This is because we have defined a list of searchable fields using the search_fields attribute. there are navigation links to navigate through a date hierarchy just below the search bar.
This has been defined by the date_hierarchy attribute. Using the prepopulated_fields attribute, the slug field is filled in automatically with the input of the title field.
Also, the author field is now displayed with a lookup widget that can scale much better than a drop-down select input. This is, achieved with the raw_id_fields attribute. You can also see that the posts are ordered by STATUS and PUBLISH
Creating model managers
Now we will create a custom manager to retrieve all posts with the published status.
Edit the models.py file of your blog application to add the custom manager :
class PublishedManager(models.Manager):
	def get_queryset(self):
		return super(PublishedManager,self).get_queryset()\
		.filter(status='published')
class Post(models.Model):
 # ...
        objects = models.Manager() # The default manager.
        published = PublishedManager() # Our custom manager.
Building list and detailed views
First, you will create your application views, then you will define a URL pattern for each view, and finally, you will create HTML templates to render the data generated by the views.
Let’s edit the view.py to display the list of posts.
from django.shortcuts import render,get_object_or_404
from .models import Post

def post_list(request):

   posts = Post.published.all()
   return render(request,'blog/post/list.html'{'posts':posts})
The post_list view takes the request object as the only parameter. This parameter is required by all views. In this view, you retrieve all the posts with the published status using the published manager
that you created previously.
Let’s create a second view to display a single post .
def post_detail(request, year , month , day , post):

   post=get_object_or_404(Post,slug=post,status='published',publish_year=year,
   publish_month=month,publish_day=day)
   return render (request,'blog/post/detail.html,{'post':post})
This view takes the year, month, day, and post arguments to retrieve a published post with the given slug and date. In the detail view, you use the get_object_or_404() shortcut to retrieve the desired post. This function retrieves the object that matches the given parameters or an HTTP 404 (not found) exception if no object is found. Finally, you use the render() shortcut to render the retrieved post using a template.
Adding URL patterns for views
URL patterns allow you to map URLs to views. Django runs through each URL pattern and stops at the first one that matches the requested URL. Create a urls.py file in the directory of the blog application and add the following lines to it:
from django.urls import path
from . import views

app_name = 'blog'

urlpatterns = [
    # post views
    path('', views.post_list, name='post_list'),
    path('<int:year>/<int:month>/<int:day>/<slug:post>/',
    views.post_detail,
name='post_detail'),
]
The first URL pattern doesn’t take any arguments and is mapped to the post_list view. The second pattern takes the following four arguments and is mapped to the post_detail view year, month, day, and post.
Now, we need to include the URL patterns of the blog application in the main URL patterns of the project.Let’s open the urls.py file and make it look like the following code:
from django.urls import path, include
from django.contrib import admin

urlpatterns = [
  path('admin/',admin.site.urls),
  path('blog/',include('blog.urls',namespace='blog')),]
The new URL pattern defined with include refers to the URL patterns defined in the blog application so that are included under the blog/ path. Namespace has to be unique across your entire project.
Next, let’s add a get_absolute_url() method to the model that returns the canonical URL for the object. So, we will use the reverse() method which allows us to build URLs by their name and pass optional parameters. Add and edit the models.py file of the blog application as the code below.
from django.urls import reverse

class Post(models.Model):
 # ...
  def get_absolute_url(self):
     return reverse('blog:post_detail',
args[self.publish.year,
self.publish.month,
     self.publish.day, self.slug])
Create templates
Templates define how the data is displayed; they are usually written in HTML.Let’s add templates to your application to display posts.
Create the following directories and files inside your blog application directory:
templates/
  blog/
   base.html
        post/
         list.html
         detail.html
Edit the base.html file and add the following code:
{% load static %}
<!DOCTYPE html>
<html>
<head>
  <title>{% block title %}{% endblock %}</title>
  <link href="{% static "css/blog.css" %}" rel="stylesheet">
</head>
<body>
  <div id="content">
  {% block content %}
  {% endblock %}
  </div>
  <div id="sidebar">
  <h2>My blog</h2>
  <p>This is my blog.</p>
  </div>
</body>
</html>
{% load static %} tells Django to load the static template tags After loading them, you are able to use the {% static %} template tag throughout this template. With this template tag, you can include the static files, such as the blog.css file, which you will find in the code of this example under the static/ directory of the blog application. You can download the CSS file from here Blog.css.
Now let’s edit the post/list.html file and make it look like the following:
{% extends "blog/base.html" %}

{% block title %}My Blog{% endblock %}

{% block content %}
 <h1>My Blog</h1>
 {% for post in posts %}
   <h2>
   <a href="{{ post.get_absolute_url }}">
   {{ post.title }}
   </a>
   </h2>
   <p class="date">
   Published {{ post.publish }} by {{ post.author }}
   </p>
  {{ post.body|truncatewords:30|linebreaks }}
 {% endfor %}

{% endblock %}
With the {% extends %} template tag, you tell Django to inherit from the blog/ base.html template. Then, you fill the title and content blocks of the base template with content. You iterate through the posts and display their title, date, author, and body, including a link in the title to the canonical URL of the post.
Truncate words the value to the number of words specified, and linebreaks convert the output into HTML line breaks.
Next, edit the post/detail.html file:
{% extends "blog/base.html" %}
{% block title %}{{ post.title }}{% endblock %}
{% block content %}
 <h1>{{ post.title }}</h1>
 <p class="date">
 Published {{ post.publish }} by {{ post.author }}
 </p>
 {{ post.body|linebreaks }}
{% endblock %}